
Discover our expert’s favorite survival recipes for when the power is out and shelf-stable ingredients are in.
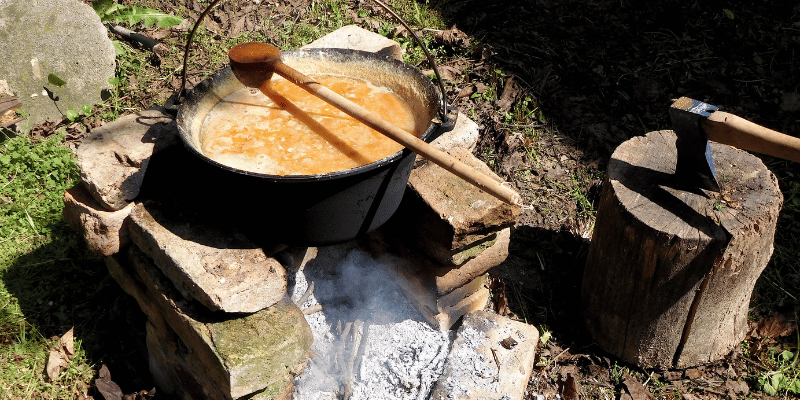
A significant event has just happened, and suddenly, running to the store or grabbing a quick burger isn’t an option. Instead, we’re left with our stash of survival food, stocked with cans, dry goods, and long-lasting basics. Are we stuck with eating cold Spam right out of the can?
I don’t know about you, but there is only so much plain, canned food a person can take before craving something a bit more… inspiring.
We tested dozens of potential recipes based on suggestions from survivalists, preparedness experts, and our grandmothers’ cookbooks. Some turned out amazing. Others? Not so much.
You’ll find our favorite recipes below, based on our tester’s ratings.
How We Tested Survival Recipes
For us, the ideal survival recipe meets a few simple, practical guidelines. These are meals to be prepared after an event, not before. We came across plenty of “survival” recipes intended for prepping ahead of time, but they often didn’t make sense for real post-event conditions. Most were designed to be portable and eaten at room temperature—not exactly ideal when you’re dealing with hot summer days and no cool storage options.
For on-the-go meals, we recommend purchasing from the best emergency food company.
Here’s the criteria we used to determine what was a “survival recipe” and what wasn’t:
- Non-perishable ingredients: Every recipe needs to use only long-lasting pantry items you’d find in the typical survival pantry.
- Simple, quick prep: In survival mode, we want easy, straightforward recipes. No one has time for a dozen steps or fancy techniques when you’re just trying to get a hot meal on the table.
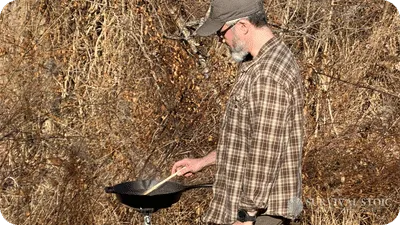
- No power required: This one is huge. If a recipe needs a food processor, an oven, or a refrigerator, it’s not making the cut. Instead, we tested each recipe using alternative methods like a reliable emergency stove, campfire, or even a trusty charcoal grill.
All of these recipes were put through the paces without a single modern convenience—just the basics to get a satisfying meal, no matter the situation.
Top 11 Survival Recipes
1. Beans and Rice
Rice and beans are a staple in many survival situations. We picked up this method from friends in Brazil and adapted it to survival cooking. This version is an all-in-one, filling meal that’s easy to prepare. We use canned beans here since they’re already cooked—perfect for a quick, low-energy dish. But if you have dried beans on hand, they work too; just remember they’ll need soaking overnight and about 1-2 hours of cooking time, which requires a bit more fuel.
Ingredients:
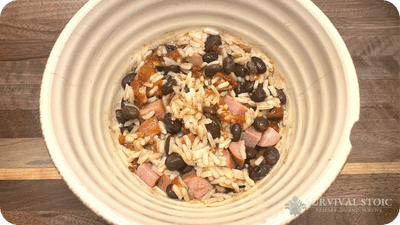
- 1 can of Black Beans
- 1 can of Rio Tel
- 1 cup of white rice
- 1 cup of canned meat chopped (Spam, canned Ham, or whatever you have)
- 2 cups of water
- 1 pkg of Sazon
- 1 Chicken Boullion cube dissolved in ½ cup water
- 1 tsp of dried Oregano or Italian Seasoning
- 1 tsp Garlic Powder
- 1 tsp of Olive Oil or vegetable oil
- Salt and Pepper to taste
Directions:
- Start by adding the rice and water to a pot with a lid. Bring it to a boil over medium-high heat. Once boiling, cover the pot, reduce the heat, and let it cook for 15 minutes. Afterward, take the pot off the heat but keep the lid on—no peeking!
- In a frying pan, warm the oil over medium heat. Add the meat and cook until it’s just starting to brown. Then, add the beans, Rotel, broth, and seasonings, and let everything simmer together for about 10 minutes.
- Remove the pan from heat, add the cooked rice, stir well, and enjoy!
2. Jerky
Got a freezer full of meat and no power? Jerky is a perfect way to make it last longer once it starts to thaw. Plus, when you’re hunting and bring home venison or other fresh game, jerky lets you preserve it without relying on refrigeration.
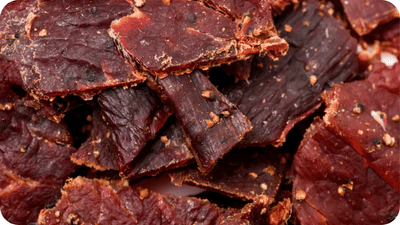
I like making jerky on my Weber kettle charcoal grill. It’s great because I can adjust the heat just by controlling the vents: closing them to cool things down or opening them to heat things up—no electricity required!
The trick with jerky is cooking it slow and low. You don’t want to cook the meat, just dry it out. Indirect heat works best here. Place the coals on one side of the grill and the meat on the other. This method is also excellent for ribs, by the way!
For the best flavor, marinate the meat first. Here’s a go-to recipe using ingredients straight from the survival pantry:
Ingredients:
- 4 pounds of Beef, Pork, Venison, or whatever you have sliced in about 1/8 inch thick strips
- 1 Tablespoon Garlic Powder
- 1 Tablespoon Onion Powder
- 1 cup Soy Sauce
- 1 cup Worchester Sauce
- 2 teaspoons Tobasco Sauce
- 1 Tablespoon Black Pepper
Directions:
- Mix all the ingredients in a bowl. Adjust quantities as needed if you’re working with less meat. Pour the marinade into a large ziplock bag, add the meat, and let it sit for 4 hours. Keep it as cool as possible while marinating.
- Fire up the grill and set it up for indirect heat, with coals or wood on one side. You don’t need a big pile—about ten coals should do the trick.
- Arrange the meat on the side of the grill opposite the coals, shaking off excess marinade. Placing aluminum foil between the meat and the coals can help keep the heat nice and even.
- Aim to keep the temperature around 150°F. A grill thermometer comes in handy here, ideally one that doesn’t require power. Adjust the vents and add coals or wood as needed. Let the jerky cook for about 6 hours until it’s thoroughly dried out.
Expert Survival Cooking Tip:
If your water supply is limited, don’t drain the water from your cans of vegetables. Instead, use the liquid in the recipe as water.
3.Chicken and Dumplings
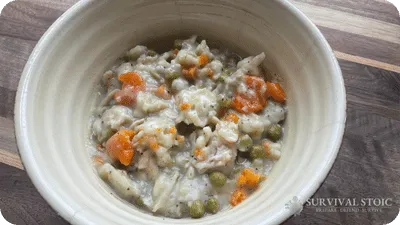
Chicken and dumplings are the ultimate comfort food. I remember my grandmother whipping up a pot on cold days, and this version, while adapted for survival pantry ingredients, still hits the spot. It may not be exactly like Grandma’s, but it’s close enough to warm you up and keep you going.
Ingredients:
- 2 cans chicken
- 2 cans chicken broth (or can substitute bouillon cubes)
- 1 can of peas and carrots, drained
- 1 tsp garlic powder
- 1 tsp Italian seasoning
- 1 tsp onion powder
- 2 cups Bisquick
- 1/3 cup dehydrated milk + 1/3 cup water (see our Favorite Powdered Milk)
- Salt and Pepper to taste
Directions:
- Start by making the dumpling dough: in a bowl, combine the Bisquick, dehydrated milk, and water until it forms a dough.
- In a pot, combine the chicken broth, garlic powder, Italian seasoning, onion powder, and canned chicken. Bring everything to a boil.
- While the broth is heating up, roll out the dough like a pizza crust. You can make it as thick or thin as you prefer, but remember, thicker dumplings will need a bit more time to cook.
- Once the broth reaches a boil, tear off pieces of dough—about 1-inch squares (or your preferred size)—and drop them into the pot. Give the mixture a quick stir, then cover, reduce the heat, and let it simmer for 10 minutes.
- Check to make sure the dumplings are cooked through. Then, add the peas and carrots and season with salt and pepper. To thicken the broth, sprinkle in a little flour and stir until it reaches your desired consistency.
4. No Bake Peanut Butter Oatmeal Cookies
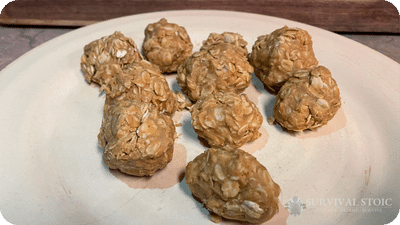
When the oven’s off the table, no-bake cookies are the perfect snack. With just a few simple ingredients, these peanut butter oatmeal bites are easy to whip up and don’t need any power to make.
Ingredients:
- 1 Cup Rolled Oats
- ½ Cup Peanut Butter
- ¼ Cup Maple Syrup
Directions:
- In a pan, combine the maple syrup and peanut butter. Heat slowly, stirring until they’re fully blended together.
- Add the oats and stir until everything is well combined. Then, remove from the heat.
- Once the mixture is cool enough to handle, use your hands to roll it into 1-inch balls. (Pro tip: slightly damp hands make this step easier.)
- Let the bites cool, then enjoy a tasty, energy-packed snack that requires zero baking!
5. Overnight Oatmeal
Oatmeal makes for a fantastic breakfast, and I personally can’t start my day without it. This no-cook variation saves precious energy, so you can conserve your resources for more important things. But hey, if you prefer a warm breakfast, feel free to toss it on the fire for a quick heat-up before digging in!
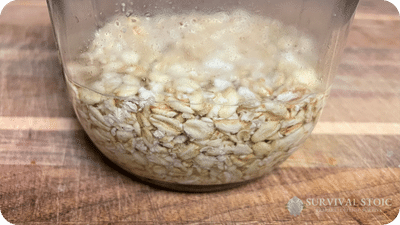
Ingredients:
- 1 Cup of Rolled Oats
- 1 ½ Cup water
- 1 tsp of Honey
- 1/8 tsp of salt
Directions:
- Before hitting the hay, combine the oats and water in a bowl or jar. Give it a good stir and let it sit overnight.
- In the morning, add the honey and salt to taste. If you’ve got some raisins or nuts hanging around, throw those in for an extra tasty crunch!
6. Tuna Cakes
Let’s be honest—eating tuna straight from the can can leave a lot to be desired. But fear not! This recipe turns those cans of tuna in your survival pantry into something delicious. Inspired by my grandmother’s salmon patties, this variation is sure to make your taste buds sing.
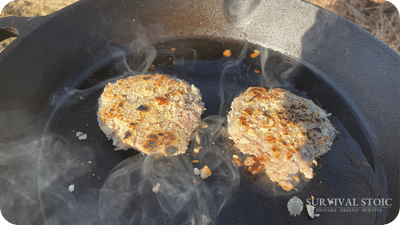
Ingredients:
- 1 can of Tuna or Salmon
- 2 Tablespoons cornmeal
- 1 Tablespoons of Vinegar
- 1/8 tsp salt
- ½ tsp Italian seasoning
- 5 Saltine Crackers, crushed
- 3 Tablespoons of vegetable oil
Directions:
- In a bowl, mix together the tuna, cornmeal, vinegar, and seasonings until well combined.
- Crush the Saltine crackers in a ziplock bag or on a cutting board until you achieve a medium texture. You want them to be crumbly but not powdery.
- Heat the oil in a skillet over medium-high heat. Shape the tuna mixture into patties, then coat them in the crushed crackers.
- Fry the patties in the hot oil until they’re golden brown on both sides.
Some of our testers ate their’s with a few drops of Tabasco sauce!
Expert Survival Cooking Tip:
Improvise! Get creative with the ingredients you have. Spices can enhance bland dishes, so use what’s in your pantry or try similar spices in smaller amounts. A versatile blend like Ms. Dash works well for many recipes.
7. Hoe Cakes
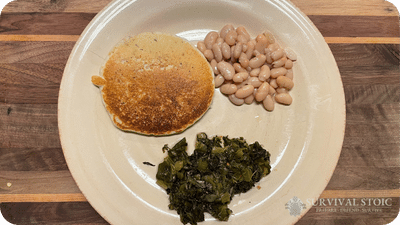
Hoe Cakes are traditional cornbread pancakes. While some folks enjoy them drizzled with maple syrup, many of our testers prefer them piled high with savory meats and toppings. In a survival situation, fresh milk and eggs might be hard to come by, but no worries—we’ve swapped them out for evaporated milk and flaxseed meal (or try our favorite powdered eggs), which are both pantry staples that pack a punch. If you’re in the mood for something sweet, feel free to toss in about ½ cup of sugar!
Ingredients:

- 1 cup flour
- 1 cup cornmeal
- 1 tsp salt
- 3 ½ tsp baking powder
- 1/3 cup vegetable oil
- ½ cup evaporated milk + ½ cup water
- 1 Tablespoons Flaxseed meal + 3 Tablespoons water
- 1 Tablespoon of vegetable oil for frying
Directions:
- In a large bowl, start by mixing together all the dry ingredients.
- In a separate bowl, combine the evaporated milk and water.
- In yet another bowl, mix the flaxseed meal with water until it forms a gel-like consistency.
- Create a well in the center of the dry ingredients and pour in the wet ingredients, including the ⅓ cup of vegetable oil. Stir everything together until just combined—don’t overmix!
- Heat 1 tablespoon of oil in a skillet over medium-high heat. Pour about ¼ cup of the batter into the skillet to form pancakes. When the edges start to look dry and bubbles begin to form on top, it’s time to flip! (If you have a hard time flipping, consider making scrambled hoecakes instead!)
8. Brunswick Survival Stew
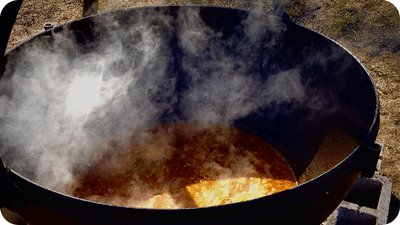
Brunswick stew is a classic Southern dish that’s wonderfully versatile—you can swap in any meat or veggies you have on hand! Whether you choose to cook it on the stove, over an open fire, or even in a bean hole, this stew promises to deliver a unique flavor every time.
Ingredients:
- 4 Tablespoons vegetable oil
- 1 wild Rabbit, dressed, skinned, and quartered
- 1 wild Squirrel, dressed, skinned, and quartered
- 1 can of cabbage, chopped and drained
- 1 can carrots, chopped and drained
- 1 can Ham, chopped
- 3 cans diced tomatoes
- 2 tsp onion powder
- 2 tsp chili flakes
- 1 TBs Worcestershire sauce
- 1 tsp paprika
- 1 can corn – drained
- 1 can okra – drained
- 1 can lima beans – drained
- 1 cup potato flakes
Directions:
- Heat the vegetable oil in a large Dutch oven or pot over medium-high heat. Season the rabbit and squirrel with salt and pepper before adding them to the pot. Brown the meat on all sides, then transfer it to a plate—don’t worry about cooking it all the way through at this point; a nice sear is all you need.
- Next, add the cabbage and carrots to the same pot and sauté for a few minutes until tender, stirring frequently. Return the seared meat to the pot along with the diced tomatoes, spices, and Worcestershire sauce. Pour in enough water to cover the ingredients by about an inch, then bring to a boil.
- Once boiling, reduce the heat, cover the pot, and let it simmer for 2-3 hours until the meat is tender (if you’re using canned meat, skip this step since it’s already cooked).
- After cooking, skim off any excess fat from the top of the stew. Remove the meat from the pot and allow it to cool slightly before shredding it off the bones. Return the shredded meat to the stew.
- Stir in the chopped ham, corn, okra, and lima beans. Simmer the mixture over low heat for another hour, stirring occasionally.
- Finally, mix in the potato flakes to thicken the stew and adjust the seasoning with salt and pepper to taste.
9. Lentil Soup
Lentil soup is a nutritious and traditional vegetarian meal often enjoyed in Asian cuisine. It’s a great option for variety in your diet, especially since lentils are packed with protein, making it a filling alternative when meat is scarce.
Ingredients:
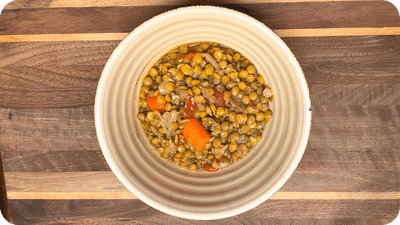
- 2 Tablespoons Vegetable or Olive oil
- 1 can of cabbage, chopped and drained
- 1 can diced tomatoes
- 1 tsp garlic powder
- 1 tsp onion powder
- 1tsp Italian seasoning
- 1 can carrots, diced
- 2 cups lentils
- 8 cups water
- 1 Tablespoons soy sauce
- 2 tsp salt
- 1TBs vinegar
Directions:
- In a pot over medium heat, add the vegetable or olive oil and sauté the cabbage and carrots for a few minutes until they soften, stirring frequently.
- Next, incorporate the remaining ingredients into the pot. Stir everything together and bring it to a simmer.
- Let the soup cook over medium heat until the lentils are tender. This typically takes about 30 minutes to 1 hour, depending on the type of lentils used.
- Season with salt and pepper to taste before serving.
Expert Survival Cooking Tip:
Use Your Judgment: Cooking temperatures may vary based on your method, so adjust accordingly. Cooking times are estimates, influenced by your heat source. Practice these recipes before relying on limited resources and fuel.
10. Fried Rabbit with Gravy
Fried rabbit is a flavorful way to prepare this meat, with the added moisture of gravy making it even more delicious. This cooking method can also be adapted to create gravy from various meats, enhancing their flavor.

For the Rabbit
Ingredients:
- 1 rabbit dressed, skinned, and cut into pieces
- ½ cup flour
- 1 tsp salt
- ¼ tsp black pepper
- ¼ cup vegetable oil
Directions:
- In a bag, combine the flour, salt, and pepper. Toss the rabbit pieces in the bag to coat them evenly.
- Heat the vegetable oil in a skillet over medium-high heat. Add the rabbit pieces and brown them on all sides. Once browned, cover the skillet, reduce the heat, and cook until the rabbit is fork-tender, turning occasionally. Transfer the cooked rabbit to a plate.
For the Gravy
Ingredients:
- 3 Tablespoons flour
- 1 cup chicken broth
- ½ cup evaporated milk + ½ cup water combined
- ½ teaspoon salt
- ¼ teaspoon pepper
- ¼ teaspoon Italian seasoning
Directions:
- After the raddit is cooked, add the flour to the drippings in the skillet, mixing well. Before the flour starts to brown, pour in the chicken broth, evaporated milk, and water, along with the seasonings. Stir frequently while cooking over medium heat until the gravy thickens.
- Adjust the seasoning with additional salt and pepper if desired. Serve the gravy over the rabbit and enjoy!
11. Survival Tacos
Who doesn’t love tacos? They’re simple to make and can be crafted using items from your survival pantry. Feel free to adjust the spices based on what you have—chili powder has been a staple in my kitchen for years!
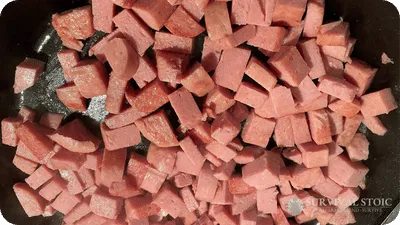
For the Meat
Ingredients:
- 1 can of Spam
- 1 Tablespoon of vegetable or olive oil
- ¼ tsp of chili powder
- ¼ tsp of garlic powder
- ¼ tsp of ground cumin
- ¼ tsp of paprika
- ¼ tsp of salt
- ¼ tsp of black pepper
Directions:
- Slice the Spam into strips and place in a bowl with the seasonings.
- Heat the oil in a skillet over medium heat and cook the Spam until lightly browned on all sides. Add the remaining spices from the bowl and cook for an additional couple of minutes.
For the Tortillas
Ingredients:
- 2 cups flour
- 3 Tablespoons vegetable oil
- ¾ tsp salt
- 1/2 cup water
Directions:
- In a bowl, combine the flour and salt.
- Add the oil and mix with your hands until the mixture forms small, dry dough balls.
- Gradually add water and mix until well combined. If the dough feels dry, add a bit more water until it reaches a workable consistency.
- Shape the dough into small disks and let them rest for 30 minutes to an hour. Heat a skillet over medium heat. On a floured surface, roll out each piece of dough to form tortillas. Aim for a thickness that holds together but isn’t too tough.
- Cook each tortilla in the skillet for about 30 seconds, flipping when slightly browned. Cook the other side until it’s also brown. Flip back and forth as needed to achieve the right texture.
- Fill the tortillas with the cooked Spam. You can add rice or mashed beans for extra substance. If you enjoy salsa, mix together some Tabasco sauce, Worcestershire sauce, and canned tomatoes for a simple topping.
Bottom Line
With the right techniques and a solid selection of survival foods, you can ensure you and your family stay nourished with these recipes, no matter the situation. Survival cooking is a lot easier if you plan ahead and plan to have a little creativity in your cooking.
Don’t forget to have a plan for how to boil water without electricity, preferably before disaster strikes.
FAQ
What is the best survival food to make?
The best survival food to make includes high-protein, nutrient-dense options like canned beans, rice, and oatmeal. These foods are not only easy to prepare but also have a long shelf life, making them ideal for emergency situations.
What is the best food to have in a survival situation?
In a survival situation, versatile foods such as peanut butter, freeze-dried meals, and jerky are considered the best, according to our experts. They are high in energy, easy to store, and require little preparation, making them perfect for maintaining stamina.
What should you stockpile before a collapse?
Before a collapse, it’s wise to stockpile non-perishable items such as canned goods, grains, and essential spices. These foods provide a balanced diet and can sustain you over time, ensuring you have enough resources when access to fresh food may be limited.
What is the most basic food you can survive on?
The most basic food you can survive on is potatoes. This veggie includes most of the necessary nutrients you need except for vitamin C, which is most easily provided by fresh fruits.
