

A bug out bag isn’t supposed to help you live in the woods forever. Its job is to keep you alive and moving long enough to reach a shelter, hotel, family member’s house, or another safe location.
That is a much more realistic problem.
At the bare minimum, you need somewhere to sleep, something to eat, and something to drink. From there, you can add medical supplies, clothing, navigation, lighting, and a few tools that earn their weight. The hard part isn’t finding more things to pack. It’s keeping the finished bag carryable.

For this guide, I worked with Blake Lankford, a former Army combat engineer who regularly carried 45- to 60-pound loads through the wet, hilly terrain of Tennessee. Jason and our team have also tested many of the specific backpacks, water filters, meals, medical kits, sleeping systems, and tools included below.
Our example bag weighs about 40 pounds, including 2 liters of water and 3 days of food. That is a realistic working load for a healthy, active adult man, not a safe target for everyone.
Start with the list below, adjust it for your body and evacuation plan, and then carry it. A bag that feels fine in your living room may feel completely different after ten miles.
72-Hour Bug Out Bag Checklist
If you only want the list, start here. This is the complete working loadout that we explain in more depth throughout this guide.
Backpack
- Osprey Kestrel 38
- Waterproof pack liner
- Small dry bags and zip bags
Shelter and Sleep
- Overhead tarp
- Ground tarp
- Sleeping bag
- Inflatable sleeping pad
- Six tent stakes
- Cordage and guylines
- Compact camping stool
Water
- 40-ounce stainless steel water bottle
- 24-ounce Grayl GeoPress
- Approximately two liters of carried water
- Water purification tablets
Food and Cooking
- Four MREs
- One 3,600-calorie Grizzly Gear ration
- Titanium folding stove
- BIC lighter
- Ferro rod
- Waterproof tinder
Medical
- MyMedic Sidekick Pro
- Personal medications (think about things you regularly use)
The MyMedic Sidekick Pro comes with a tourniquet. But, if you decide to purchase an extra one, I recommend purchasing from a real medical supplier. This is one piece of equipment I would not trust to a random Amazon seller.
Clothing
- One change of clothes
- Two extra pairs of socks
- Seasonal insulating layer
- Rain jacket
- Work gloves
- Hat
Lighting and Power
- Headlamp
- Backup flashlight
- Spare batteries
- Emergency weather radio
- Phone power bank
- Charging cables and wall plug
Navigation and Signaling
- Local paper maps
- Sighting compass
- Protractor
- Waterproof notepad and pen
- Whistle
- Signal mirror
Tools and Repairs
- Leatherman Wave+
- Roll of Gorilla Tape
- Small sewing kit
- Zip ties
Hygiene and Documents
- Combat Wipes
- Toilet paper
- Toothbrush and toothpaste
- Hand sanitizer
- Grocery bags for waste
- Sunscreen, insect repellent, and lip balm
- Microfiber towel
- Cash
- Copies of identification and important documents
- Waterproof document pouch
The complete bag weighs about 40 pounds: 29.5 pounds of reusable gear, four pounds of water, and 6.5 pounds of food.
That number will change when you substitute your own clothing, medication, sleeping gear, and seasonal equipment. Weigh every item instead of trusting the number printed on a product page. Small differences add up surprisingly fast.
Decide What Your Bag Needs to Do
Before you decide what belongs in your bag, decide where you’re going.
A bag built to reach a nearby shelter is different from one meant for a three-day walk through remote terrain. In most emergencies, you’re trying to get somewhere safer. You aren’t moving into the woods.
Ask yourself:
- Where will I go if I have to leave home?
- How far might I need to travel on foot?
- Will I have access to emergency services, shelters, or family?
- Who will be traveling with me?
- Where can I refill and treat water?
- What weather am I likely to face?
Your vehicle may handle most of the trip. It may also get stuck in traffic, run out of fuel, or become useless because a road is blocked or destroyed. Your bag should be light enough to move on foot if you have to leave the vehicle behind.
Distance matters, too. Blake’s typical military movements ranged from about three to 15 miles through hilly terrain. A 40-pound bag may be manageable for a healthy, active adult who has trained with it. That same bag could be completely unrealistic for someone smaller, older, injured, or out of shape.
Be honest here.
If you can’t carry the finished bag for your planned distance, you need to remove gear, share group equipment, buy lighter versions of important items, or improve your conditioning. Don’t solve the problem by randomly removing water, shelter, or medical supplies and hoping for the best.
You can’t pack for every possible emergency. Build around the most likely route and destination, then make a few seasonal or situation-specific changes when needed. Otherwise, you’ll eventually end up carrying half the garage.
How We Built This 40-Pound Bug Out Bag
The checklist above wasn’t built by collecting every survival item we could think of. We started with what the bag actually needs to do, then made each item earn its weight.
Blake provided most of the field and packing decisions. As an Army combat engineer, he regularly carried 45- to 60-pound loads for three to 15 miles through the wet, hilly terrain of Tennessee. His field exercises typically lasted a weekend, although his longest lasted a month.
That experience changes how you look at a packing list.
It is easy to build a lightweight bag on paper. It is much harder once you add enough food, water, shelter, clothing, and medical gear to function for three days.
Jason and the rest of our team provided the product-testing side. We have handled and tested many of the specific backpacks, water filters, purification tablets, emergency meals, medical kits, sleeping systems, lights, stoves, and tools included in this bag. When we recommend a particular product, we link to the full review so you can see how it performed and where it fell short.
Why the Bag Weighs About 40 Pounds
The weight breaks down roughly like this:
| Part of the Load | Approximate Weight |
|---|---|
| Backpack and reusable gear | 29.5 pounds |
| Carried water | 4 pounds |
| Three days of food | 6.5 pounds |
| Total | About 40 pounds |
Water and food account for more than ten pounds by themselves. The empty Osprey Kestrel 38 weighs a little over four pounds. You still haven’t added shelter, a sleeping bag, an inflatable pad, clothing, medical gear, or anything else.
Forty pounds is not ultralight. It isn’t supposed to be.
You can lower the weight by purchasing expensive lightweight gear, sharing group equipment, carrying less food, or removing optional items such as the stool. Access to reliable water along your route may also let you start with less.
Just pay attention to what you’re giving up. A lighter bag isn’t automatically better if the missing weight was your dry clothing or sleeping system.
Is 40 Pounds Too Heavy?
For some people, absolutely.
Blake’s 40- to 45-pound recommendation assumes a healthy, active adult man who has practiced carrying the load. A smaller adult, child, older person, or anyone dealing with an injury will probably need a lighter bag.
Children can generally carry some of what they need, like food. However, they should mostly be sharing equipment with adults.
There is no percentage or online calculator that can tell you exactly what your body can handle. Load the bag, walk with it, and increase the distance gradually. If you can’t carry it safely, change the gear or divide shared items between the adults in your group.
The bag has to work for the person carrying it. Close doesn’t count much when you’re still eight miles from where you need to be.
The Complete 72-Hour Bug-Out Bag List
The checklist tells you what is in the bag. Now, let’s look at why those items made the cut and where we found the extra weight worthwhile.
Shelter and Sleep
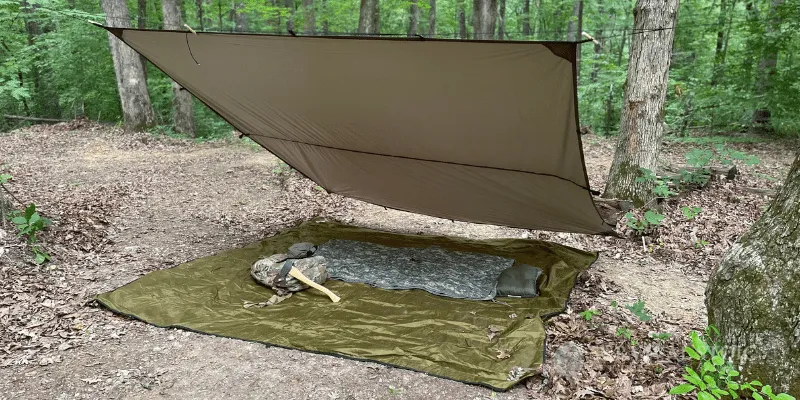
Blake’s shelter setup uses two tarps: one overhead and one underneath the sleeping system.
For the overhead tarp, weight matters. Blake’s favorite Aqua Quest Defender is extremely durable and has handled plenty of wet Tennessee weather, but it weighs 3.3 pounds. That makes more sense at a bushcraft camp than in a bag you may carry for 15 miles.
The Aqua Quest Safari is a better fit here. It weighs 1.7 pounds, has 19 tie-out points, and still held up well during testing. Add six stakes and enough cordage to pitch it in several configurations.
On the ground, we use the Arcturus Heavy Duty Survival Blanket. It weighs about 19 ounces and has a waterproof outer layer with reflective material on the inside. I’ve used mine as a groundsheet, windbreak, and tarp without tearing it.
Thin mylar blankets are much lighter, but they aren’t ground tarps. A stick, rock, or enthusiastic unfolding can tear one before you even get settled.
You’ll still need actual insulation between your body and the ground. Blake strongly recommends an inflatable sleeping pad. It adds comfort, but comfort isn’t the only point. Sleeping directly on cold or wet ground pulls heat from your body and makes it much harder to get useful rest.
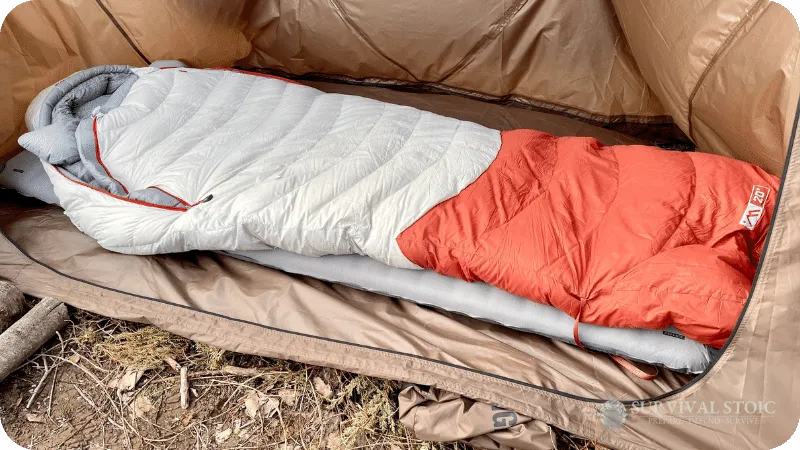
Jason tested the Ampex lightweight sleeping pad and 20-degree XL sleeping bag together. The pad weighs just over one pound, while the sleeping bag weighs about three pounds. Jason stayed warm when using the bag around 40 degrees, although we haven’t personally verified its 20-degree rating.
Choose your sleeping bag based on the temperatures you may actually encounter. A lightweight summer bag will not cover a January evacuation, and a heavy winter bag wastes space for much of the year. This is one of the parts of your bag that should change seasonally.
The camping stool is optional. Blake likes having somewhere dry to sit during rest breaks and would strap it to the outside of the pack. If your finished bag is too heavy, though, the stool is an easy first cut.
A tent can also make sense in severe insects, cold weather, or a family evacuation. Just treat it as a replacement for part of this shelter system. Don’t pack a tent, two tarps, an emergency bivy, and three blankets because each one sounded useful on a different checklist.
Water and Purification
Water is where bug out bag math gets annoying. You need plenty of it, but one gallon weighs more than eight pounds. Carry three days’ worth from the start, and the weight gets ridiculous.
We carry approximately two liters: a 40-ounce stainless steel bottle and a 24-ounce Grayl GeoPress. Together, the water weighs about four pounds.
That is enough to start moving. It is not enough for 72 hours. Your evacuation plan needs to include places where you can safely collect and treat more water.
The stainless steel bottle should be non-insulated. You can place it over a fire or small stove to boil water, so it also handles the job of a separate metal cup. Do not try that with an insulated bottle.

The Grayl GeoPress is our primary water purifier. Jason has used it with water collected from streams and lakes, and it takes about ten seconds to press 24 ounces. The purifier is built into the bottle, which makes it much easier to use while traveling than a filter with several loose pieces.
I also pack water purification tablets. They weigh practically nothing and give you another option if the purifier breaks, clogs, or freezes. I prefer Potable Aqua with PA Plus, but you need to follow the package directions and allow the full treatment time.

Blake prefers bottles over a water bladder. Bladders are more complicated to clean, and having a container of cold water pressed against your back can pull away body heat. Bottles are simpler and easier to refill separately.
Keep at least one bottle somewhere you can reach without unpacking the bag. Blake’s rule during long movements was simple: if you stop for any reason, drink some water. Do not carry four pounds of water all day while slowly becoming dehydrated.
Food and Cooking
Food in a bug out bag has to justify its weight. This is not the place for dry pasta, rice, or beans. They may be cheap, but they require water, fuel, cookware, and time. You may be short on all four.
Our loadout includes four MREs and one 3,600-calorie Grizzly Gear ration. Together, they weigh about 6.5 pounds.
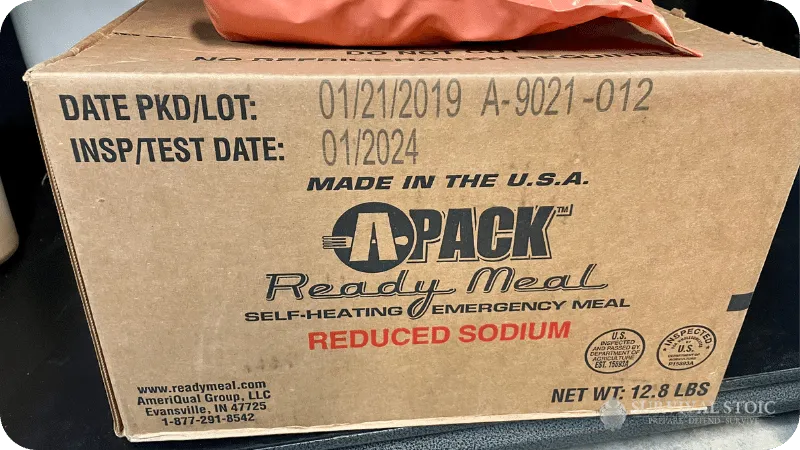
Blake is used to MREs from his time in the Army. They’re heavier and bulkier than freeze-dried meals, but they can be eaten without heating. That matters when you’re still moving, the weather is bad, or starting a fire would be unsafe.
Mountain House meals are another good option. They’re lighter, and they’re some of the best-tasting emergency meals we’ve tested. However, they require additional water and usually taste best when you can boil it. If you use them, substitute them for some of the MREs instead of adding them on top.
The Grizzly Gear ration is the backup. It contains nine 400-calorie bars and doesn’t require cooking or water. We’ve tested several emergency food bars, and these are the ones my family will willingly eat. I actually had to hide them from my children while working on the review.

You probably won’t want to eat ration bars for every meal. Still, they make sure you have calories available when you can’t stop long enough to prepare anything.
For cooking, we pack a folding titanium stove. Jason has used the Outdoor Element stove with small sticks and leaves. It folds flat, contains the fire, and holds the stainless steel water bottle above the heat. It is much easier to boil water this way than to try to balance a bottle over an open fire.
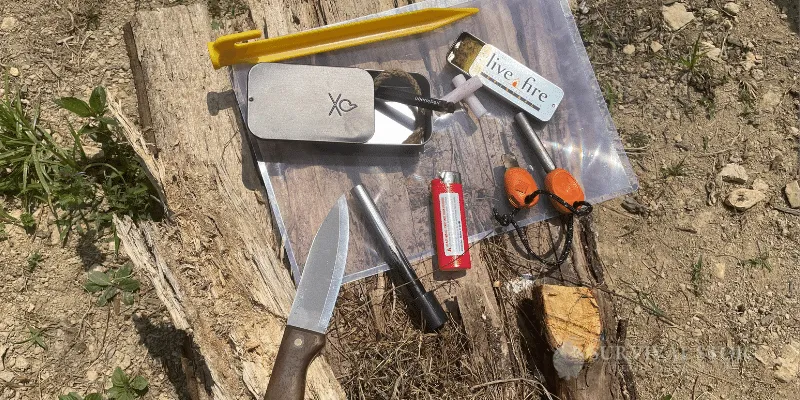
The fire kit is deliberately simple:
- BIC lighter
- Ferro rod
- Waterproof tinder
The lighter is what you’ll probably use. The ferro rod is there because lighters can get wet, leak, or stop working. Practice with it before putting it in your bag. An emergency is a terrible time to discover that starting a fire with a ferro rod is harder than it looks.
Try the food before you eat it, too. Carrying three days of something that upsets your stomach is its own type of emergency.
Medical and Hygiene
Your medical kit needs to handle two very different problems: ordinary injuries that make walking miserable and serious bleeding that cannot wait for emergency services.
The goal isn’t to carry a field hospital. It is to keep a manageable injury from stopping you and buy time until help arrives.
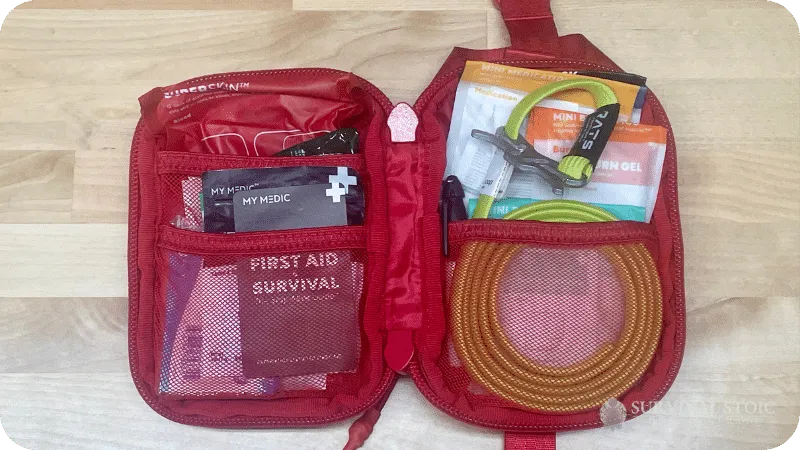
We use the MyMedic Sidekick Pro. I’ve carried this kit while hiking and camping, and it covers the injuries you’re most likely to deal with, including blisters, small cuts, burns, dehydration, and bleeding. The supplies are color-coded, so you aren’t digging through one large pile when you need something.
It also includes a tourniquet. If you want to add or replace one, I recommend a CAT or SOF-T purchased from a legitimate medical supplier. This is one piece of equipment I would not trust to a random Amazon seller.
A tourniquet also doesn’t do much good if you have no idea how to use it. Get proper first-aid training and practice with a separate training tourniquet. Keep the real one staged and ready for an emergency.
The entire medical kit should be somewhere you can reach quickly. Do not bury it underneath your sleeping bag because it happens to fit nicely there.
Add your personal medications separately. Think beyond prescriptions. If you regularly need allergy medication, pain relievers, an inhaler, glucose, or stomach medication, pack it. Keep medications labeled, watch expiration dates, and replace anything you use.
Hygiene supplies prevent their own set of problems. Combat Wipes, toilet paper, hand sanitizer, and grocery bags give you a basic way to clean up and contain waste. The grocery bags are especially useful when you need to carry waste until you reach a proper disposal point. Tie the bag closed and move on.
We also pack a toothbrush, toothpaste, sunscreen, insect repellent, lip balm, and a small microfiber towel. These aren’t exciting pieces of survival gear, but sunburn, bug bites, and constantly damp skin can make an already difficult trip much worse.
Blake eventually stopped carrying shaving supplies during extended training. Shaving wastes water, and small cuts give you another opportunity for infection. Unless you have a job that absolutely requires it, you can survive three days with some stubble.
Clothing
Clothing is easy to overpack because every extra item sounds reasonable. Then you end up carrying a second wardrobe through the woods.
For a 72-hour bag, we pack one complete change of clothes, two extra pairs of socks, a seasonal insulating layer, a rain jacket, work gloves, and a hat. You’re already wearing one set of clothing, so this gives you a dry replacement without adding too much weight.
Choose clothes meant for movement. If you tend to have problems with chafing, specialty hiking underwear is worth considering. This is also one of those things you need to test yourself. What works perfectly for Blake may drive you crazy after six miles.
Keep the change of clothes inside a dry bag or waterproof pack liner. Dry clothing gives you something warm to change into after rain, a creek crossing, or a very sweaty day. That matters more than having several outfit choices.
Your jacket and rain gear should stay near the top of the pack. Blake organizes his bag around accessibility. If the morning is cold and the afternoon is hot, he needs somewhere to put his jacket without unpacking everything else first.
Footwear deserves just as much attention as the clothing inside the bag. Wear the boots or shoes you plan to use during practice hikes. A pair that feels fine for two hours may become unbearable after several days.
Blake generally stopped for five minutes every three miles during long movements. During that break, he would drink water, loosen his boots when possible, and change his socks if they were wet or causing problems.
Extra socks are worth the space.
Pay attention to what your feet are telling you. A warm spot that might become a blister needs to be cleaned, dried, and covered before it gets worse. Sharp pain or an inability to put weight on your foot is different. Continuing to walk on a serious injury can turn a temporary problem into permanent damage.
The same rule applies to the rest of your clothing and gear: if something rubs, pinches, or becomes genuinely uncomfortable during a practice hike, fix it then. It will not become more comfortable during an evacuation.
Lighting, Communication, and Power
A headlamp is the primary light in this bag. It leaves both hands free while you set up a tarp, treat an injury, cook, or look through your pack in the dark.
Jason likes the Princeton Tec Byte Tactical headlamp. It is affordable, compact, and simple enough to operate without cycling through twelve flashing modes first. Keep it near the top of the bag rather than buried with the camping equipment.
We also carry a separate backup flashlight. Jason and the team have tested more than 20 tactical flashlights, including models carried for years. Your phone’s flashlight does not count as the backup. You need that battery for communication.
Pack spare batteries that fit your lights, and standardize battery sizes when possible. Check them during your regular bag inspections. Finding a corroded battery after the power goes out is a little too late.
Light also doesn’t automatically make nighttime travel safe. Blake recommends stopping if the terrain, weather, or darkness makes movement dangerous. If you don’t have the skills and equipment to navigate at night, wait until you can see where you’re going.
An emergency weather radio gives you access to NOAA alerts and official updates when cell service or internet access is unreliable. We’ve tested battery-powered, solar, and hand-crank models. Whatever you choose, charge it beforehand and learn how to tune it before an emergency.
Treat the hand crank and small solar panel as backup charging methods. They’re useful, but neither one works as quickly as plugging the radio into an outlet.
For the phone, pack a charged power bank, the correct cable, and a wall plug. The wall plug is easy to forget, but this bag assumes you’re probably traveling toward a shelter, hotel, public building, or another place where emergency services are operating. If an outlet becomes available, use it.
Keep the phone in low-power mode when service is limited. You can also use airplane mode while you aren’t actively checking messages or making calls. The goal is to preserve enough power to receive alerts, contact family, and call for help if you need it.
Navigation and Signaling
Your phone will probably be the easiest navigation tool while it works. Download offline maps before an emergency, but don’t make the phone your only plan. Batteries die, screens break, and damaged cell networks may not load the map when you need it.
Carry paper maps covering your home, workplace, evacuation routes, and likely shelter locations. Mark at least two ways to reach each destination. A familiar bridge, road, or trail may be closed when you actually need to leave.
We also carry a sighting compass. A good sighting compass helps you take accurate bearings and maintain a straight direction over distance. However, a compass only tells you direction. It does not magically tell you where you are.
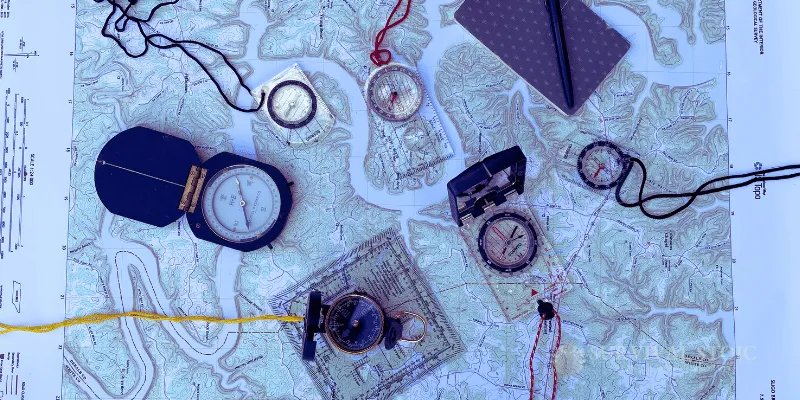
Blake also packs a map protractor because he has military land-navigation training. It can be used to plot grid coordinates and measure an azimuth on a map. If you don’t know what any of that means, simply putting a protractor in your bag won’t help much.
Learn to use your specific compass with your local maps. Practice plotting a route, following it, and confirming your position before you need to do it under stress. For most people, this takes more than watching one video.
A waterproof notepad and pen give you somewhere to record addresses, phone numbers, coordinates, meeting locations, and route changes. Write down essential family contact information ahead of time. You may know every phone number when your phone is working. Most of us know far fewer once it isn’t.
The whistle and signal mirror are there to help other people find you. A whistle carries farther and requires much less energy than repeatedly shouting. Attach it to a shoulder strap or another place you can reach without removing the bag.
A signal mirror works during daylight and weighs almost nothing. Some sighting compasses include a mirror, but a separate signaling mirror is usually easier to aim and use over distance.
These tools are especially important if an injury or unsafe conditions force you to stop moving. Reaching the shelter yourself is Plan A. Making it easier for emergency responders to locate you is the backup.
Tools and Repairs
Most gear failures are small. A screw works loose, a tarp tears, a zipper pull breaks, or a strap starts separating. You need enough equipment to make a temporary repair, but you do not need to carry an entire toolbox.
The Leatherman Wave Plus is our primary tool. It includes pliers, two knife blades, a wood saw, scissors, a file, screwdrivers, and a can opener. The interchangeable screwdriver bits are especially useful for tightening equipment, electronics, and vehicle parts.
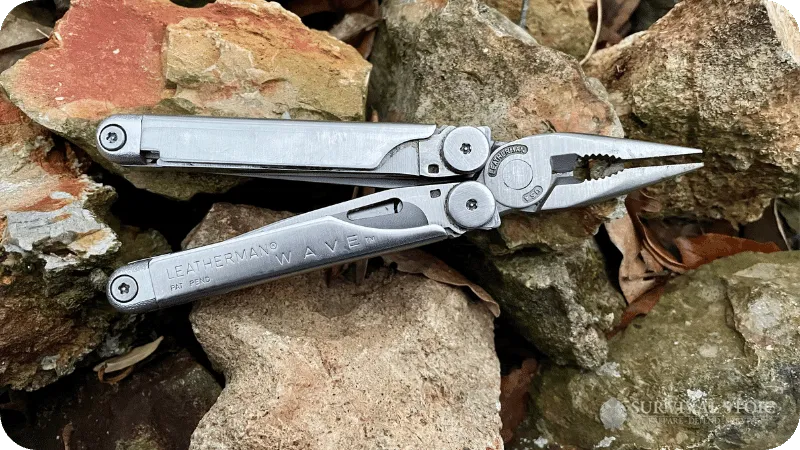
Jason’s Leatherman Wave is almost ten years old. He has used it for everything from minor vehicle repairs to fixing gear at the range. It gives you a surprising amount of capability for 8.5 ounces.
We do not include a separate axe, large survival knife, or full-sized saw in this loadout. Those tools have their place, but this bag is designed to get you to a shelter or another safe location. You are not planning to build a cabin.
A roll of Gorilla Tape handles many of the repairs that don’t require a tool. Jason prefers the narrower one-inch rolls because they take up less room while still being strong enough for torn tarps, damaged rain gear, loose equipment, and temporary strap repairs.
Zip ties are useful for securing loose gear, replacing a broken attachment, and keeping cords under control. Carry several sizes if you already have them, but you don’t need a bag containing 200 zip ties.
The small sewing kit is for clothing, pack fabric, and other repairs that need more than tape. It doesn’t have to be elaborate. A few needles and strong thread are enough for most temporary fixes.
Keep the tape, sewing kit, and zip ties together in a small repair pouch near the top of the backpack. If something breaks while you’re moving, you should be able to fix it without spreading the entire contents of your bag along the side of the road.
Finally, use the multitool before the emergency. Open each tool, learn how the locks work, and make a few basic repairs with it. A multitool is only useful if you can find the correct tool without fighting with it for ten minutes.
Documents and Cash
Documents are boring bug out bag gear. They’re also what allows you to prove your identity, refill a prescription, contact family, file an insurance claim, or check into temporary housing after an evacuation.
Keep copies of the following in a waterproof document pouch:
- Driver’s licenses or other identification
- Health and auto insurance cards
- Homeowner’s or renter’s insurance information
- Prescription and medication lists
- Emergency phone numbers
- Birth certificates and passports when relevant
- Important medical information
- Family meeting locations and out-of-area contacts
These should generally be copies rather than the only originals you own. Keep original documents in a secure, waterproof, and fire-resistant location unless you have a specific reason to evacuate with them.
The pouch should remain inside the pack liner or a dry bag. “Waterproof” equipment occasionally has a very optimistic definition of waterproof.
Cash also belongs in the bag. Card readers, ATMs, and payment apps may not work during a power or internet outage. Carry enough to cover immediate expenses such as food, fuel, transportation, or one night of lodging.
Use smaller bills. A $100 bill isn’t very useful if the person selling you bottled water can’t make change. Divide the cash between your document pouch and another secure location so losing one item doesn’t leave you with nothing.
Review the documents whenever you inspect the rest of the bag. Replace expired identification and insurance cards, update medication lists, and make sure the emergency phone numbers still belong to the right people. Children grow, prescriptions change, and insurance companies send new cards for reasons known only to them.
How to Pack a Bug Out Bag for Fast Access
Most packing diagrams tell you to place the heaviest equipment close to your back. Blake doesn’t organize his bag solely around weight. He packs according to what he expects to need first and most often.
That doesn’t mean letting heavy gear swing from the outside of the pack. The load still needs to be balanced and secure. He simply isn’t going to bury his jacket under the sleeping bag because a diagram told him it belonged there.
The Osprey Kestrel 38 works well for this approach. It has a top-loading main compartment, a separate lower compartment, and a side zipper. During our testing, those access points made it much easier to reach equipment without unloading the entire backpack.
A practical arrangement looks something like this:
- Quick-access areas: Water, first-aid kit, rain jacket, headlamp, maps, compass, snacks, and fire kit
- Main compartment: Food, stove, spare clothing, hygiene supplies, and repair gear
- Lower compartment: Sleeping bag and other equipment you probably won’t use until camp
- Outside straps or pockets: Camping stool, wet tarp, and other items that are too bulky or dirty for the main compartment

Keep clothing, documents, electronics, and sleeping gear inside the waterproof liner. If a tarp is wet when you break camp, attach it outside or isolate it in its own waterproof bag. There’s no sense in protecting your sleeping bag from the rain and then wrapping it in a wet tarp yourself.
Use small pouches and dry bags to keep related items together, but don’t overdo it. Too many organizers create another problem: remembering which tiny bag contains the thing you need.
The correct layout also depends on your dominant hand. Put water, lights, tools, and other frequently used gear where you can reach them naturally. Blake is left-handed, so his preferred arrangement may be the opposite of what works for a right-handed person.
Once the bag is packed, put it on and move around. Bend over, step up onto something, and walk at a normal pace. Nothing should swing, rattle, dig into your back, or pull you noticeably toward one side.
You will probably rearrange it several times.
That is normal. The first packing attempt rarely survives the first practice hike.
How to Test Your Bug Out Bag
A packed bag sitting in a closet tells you almost nothing about whether it works.
Blake has carried packs that felt comfortable for a few hours and became miserable after several days. He has gotten rid of plenty of them for that reason. The pack you need for a day hike and the one you can live out of for three days are not necessarily the same bag.
Start with short practice hikes if you aren’t already used to carrying weight. Do not load 40 pounds onto your back and attempt twelve hilly miles on your first Saturday. Increase the weight and distance gradually.

Eventually, Blake recommends a full test: carry the complete bag ten to twelve miles to a campsite, then live out of it for two or three days.
Use the actual loadout during the test. Carry the water and food. Set up both tarps, sleep on the pad, prepare a meal, purify water, use the headlamp, and get dressed from the clothing packed inside. Keep normal emergency backup available, but try not to use it unless you genuinely need it.
Pay attention to five things:
- Pack fit: Note pressure points, rubbing, numbness, or pain.
- Accessibility: Track anything you repeatedly have to unpack the bag to reach.
- Water and food: Record how much you actually consume.
- Gear performance: Use the filter, stove, sleep system, medical supplies, and navigation tools.
- Missing or unused items: Add what you needed and seriously question anything you carried for three days without touching.
Stop regularly during the hike. Drink water, check your feet, loosen your boots, and change socks when necessary. Small problems are much easier to fix before they become injuries.
The 40-pound loadout in this guide assumes a healthy, active adult male. It may be too heavy for a smaller adult, an older person, or someone who has not been training. Your practice hikes will tell you more than a percentage-of-body-weight formula ever will.
After the test, repack the bag and weigh it again. Make one change at a time when possible so you can tell whether it actually helped.
Do not assume your normal hiking backpack can double as your bug out bag. Test it with the specific weight, gear, distance, and number of days you expect it to handle. Some lessons only become obvious after you have carried the problem for ten miles.
Adjust the Bag to the Person and the Evacuation
This exact loadout was built around a healthy, active adult traveling through Tennessee. The terrain here is hilly, heavily wooded, humid, and often wet. Blake’s normal training movements ranged from about three to fifteen miles.
Your bag may need to be different.
Start with four questions:
- Who will carry the bag?
- How far might that person need to walk?
- Where are they trying to reach?
- What weather and terrain are likely along the way?
This guide assumes emergency services are still functioning and you’re probably traveling toward a shelter, hotel, family member’s home, or another safe location. If that is also your plan, don’t add weeks of hunting, trapping, and wilderness-living equipment. You’re evacuating, not starting a new homestead.
Blake has never been able to build a true grab-and-survive bag weighing much less than 40 to 45 pounds without using expensive lightweight gear. That explains the weight of this loadout, but 40 pounds is not a goal everyone should force themselves to meet.
A smaller adult, older person, child, or anyone with physical limitations will need a lighter bag. In a family, distribute shared equipment according to each person’s ability. One adult might carry the stove and radio while another carries more food or shelter gear.
Some supplies should remain personal whenever possible. Each person needs access to water, essential medication, weather-appropriate clothing, and a light. Do not put every critical item in one person’s bag and assume the group will never become separated.
Adjust the loadout seasonally:
- Hot or humid weather: Carry more water when refill points are uncertain. Prioritize sunscreen, insect repellent, breathable clothing, and extra socks.
- Cold weather: Add appropriate insulation, gloves, and a warmer sleeping bag. Keep purification tablets available because filters can freeze.
- Heavy rain: Make sure the pack liner, rain jacket, tarps, and dry bags are ready to use rather than merely present.
- Longer foot travel: Pay closer attention to footwear, calories, water access, and pack comfort.
- Vehicle-heavy evacuation: Keep the bag ready to carry in case traffic, fuel problems, or road closures force you to leave the vehicle.
If the finished bag is too heavy, remove duplicate and comfort items first. The camping stool is easier to give up than your water purifier.
Do not cut the equipment that gives you somewhere to sleep, something to drink, and something to eat merely to reach an arbitrary weight.
Finally, update the bag when your route, health, family, or season changes. A perfectly packed summer bag can become a very bad winter bag without anyone touching it.
What We Deliberately Left Out
The missing items are intentional. Every piece of gear adds weight, occupies space, and creates one more thing you have to manage.
Body Armor

Blake does not recommend body armor for this bag. It is heavy, hot, and exhausting during long movements. This loadout assumes you’re evacuating toward emergency services, not preparing for combat.
Range Belt
Range belts work well at the range. They are not especially comfortable after miles of walking with a loaded backpack.
Firearm
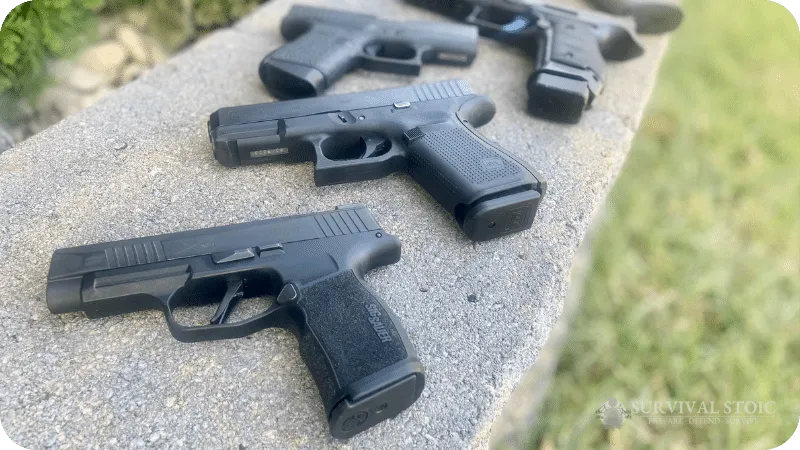
We did not include a firearm in the checklist or the 40-pound total because laws, training, household safety, and personal comfort vary too much.
Blake recommends lawful concealed carry for someone who is properly trained and already carries regularly. If you choose this option, use a secure holster, understand the laws wherever you may travel, and practice while wearing the loaded backpack.
Do not buy an unfamiliar handgun, drop it loose inside the bag, and call that preparedness. Our concealed carry guide covers the training, equipment, safety, and responsibilities involved.
Water Bladder
Blake replaced his CamelBak with water bottles. Bladders are harder to clean, and cold water resting against your back can pull away body heat. Bottles are also easier to remove, inspect, refill, and use separately.
Axe, Large Saw, and Oversized Survival Knife

We already have a Leatherman Wave Plus, a stove, tarps, and prepacked food. This bag is not intended for building a permanent wilderness camp.
Large cutting tools may be useful for a remote bushcraft trip. For an evacuation bag, they add more weight than value.
Separate Metal Cup
The non-insulated stainless steel water bottle can be used to boil water over the stove. Adding another metal cup would duplicate a job the bottle already handles.
Dry Pasta, Rice, and Beans

These foods are inexpensive, but they require too much water, fuel, time, and cooking equipment. They make much more sense in a home emergency pantry than in a bag you’re carrying on foot.
Extra Clothes and Shaving Supplies
One change of clothing and extra socks are enough for three days. Additional outfits consume space quickly.
Blake also stopped carrying shaving equipment during extended field training. Shaving wastes water, and small cuts give you another opportunity for infection. A razor is very easy to leave at home.
None of these items is permanently forbidden. Add something when your route, training, or likely emergency gives you a real reason to carry it. Then add its weight to the total and test the bag again.
Where to Store and Maintain Your Bug Out Bag
Keep the bag somewhere dry, reasonably temperature-controlled, and easy to reach on your way out of the house. A hall closet, bedroom closet, or designated shelf near an exit usually works better than an attic, damp basement, or garage.
Do not bury it behind holiday decorations.
Everyone in the household should know where the bags are stored. Adults should also know which bag belongs to each person and where any shared equipment is kept.
Extreme heat shortens the useful life of food, medication, batteries, and electronics. That makes a vehicle a poor long-term storage location for your primary bug out bag. Keep a separate get-home bag in the vehicle if you need supplies while away from home.
If you store water inside the bag, rotate it and check regularly for leaks. Another option is to keep sealed water directly beside the bag. Just make sure “I’ll fill the bottles before we leave” doesn’t become “we left without water.”
Inspect the complete bag at least twice a year. Seasonal clothing changes are a good reminder.
During each inspection:
- Check food, medication, and water-treatment expiration dates.
- Charge the power bank, radio, flashlight, and rechargeable batteries.
- Inspect disposable batteries for leaks or corrosion.
- Check the water purifier and store it according to its instructions.
- Replace clothing that no longer fits.
- Swap seasonal layers and sleeping equipment.
- Confirm that identification, insurance cards, and contact information are current.
- Inspect the backpack, straps, buckles, liner, tarps, and dry bags for damage.
- Replace anything used during a practice hike or actual emergency.
Write the inspection date on a tag inside the bag or add a recurring reminder to your calendar. Without a record, it is very easy to convince yourself that you checked everything “recently” when recently was three years ago.
If you include a firearm, it needs to remain secured from unauthorized access and stored according to the laws that apply to you. A loaded handgun sitting unattended inside an easily grabbed backpack is not a safe storage plan.
After the inspection, carry the bag. Even a short practice walk confirms that nothing has leaked, shifted, expired, or mysteriously gained ten pounds while sitting in the closet.
Build the Bag, Then Carry It
A bug out bag isn’t finished when you zip it closed. It is finished when you’ve carried it far enough to discover what hurts, what gets in the way, and what you forgot.
This loadout weighs about 40 pounds. It isn’t ultralight, but it gives you somewhere to sleep, safe water to drink, enough food to keep moving, and the basic equipment needed to reach a safer location. Adjust it for your body, family, route, and season.
Use the checklist to build the bag. Weigh every item. Then start walking with it.
If possible, work up to Blake’s full test: carry the loaded bag ten to twelve miles and camp with it for two or three days. Use the equipment instead of simply admiring how neatly it fits. Anything that breaks, rubs, leaks, or remains impossible to find needs another look.
Hopefully, you never have to grab the bag during a real evacuation. That’s fine. Preparedness is still knowing that if you do need it, you’re carrying equipment you understand, not forty pounds of things you ordered online and forgot about.
