

This guide will walk you through 9 practical steps to how to start prepping on a budget.
We have been preparing for emergencies for years and we know how expensive it can be! But we’ve also found many ways to save money on essentials. We’ve also learned what not to spend money on.
We’ll cover everything from building your emergency food supply to the most practical first-aid supplies.
Let’s jump right in:
Prepping on a Budget
Follow this 9 step plan to stay focused on what you need to be prepared. It’s not just about buying cheap stuff, it is about learning what is critical and what is not.

1. Assess Your Needs
Before you purchase anything, you need to assess your needs. This means considering:
- Number of people. How many people are in your household?
- Dietary restrictions. Does anyone have an allergy or other dietary restriction?
- Medical needs. Consider any medical conditions or medications that may require special consideration.
Beyond your household, you must also research the types of natural disasters common in your area.
If you live in Florida, preparing for hurricanes is a no-brainer. In Arizona? Not so much.
Man-made disasters will be a bigger problem in urban areas, where civil unrest may be a real problem.
This makes complete sense from a practical standpoint, but there is another reason to narrow down what you’re preparing for:
It helps you save money.
Determine Your Budget
Once you have that figured out, set aside a budget for prepping based on your financial situation.
This guide will work through exactly what you should purchase and when. The amount of funds you allocate will determine how quickly you get stocked up.
That said:
Even $5 makes a difference. It’s better to buy something than purchase nothing at all.
Don’t forget to factor in long-term costs. Once you have a stock of supplies, you’ll need to replace things regularly. (Though many of these things, like food, can be used, so you aren’t really losing money.)
2. Build a Non-Perishable Pantry
If you could only stock up on one thing, what should it be?
Food.
Learn to Cook with Basic Ingredients
Before stocking anything in your pantry, you need to learn how to use it. All the dried beans in the world won’t save you if you don’t know how to cook them.
If you have already cooked some recipes from scratch, consider how you can make them using non-perishable ingredients. Can you reasonably switch out the meat for canned meat, for instance? This works fine for some recipes, but you’ll find that it doesn’t work for everything. No one is making burgers from canned meat.
If you need some inspiration, we’ve written about our favorite survival recipes. These are real recipes that we eat made from non-perishable ingredients. Many of these recipes were “normal” until we experimented with them.
Use them for inspiration. Make your own recipes. Whatever works!
Buy in Bulk
We know that buying in bulk saves money. But when you’re prepping, it really saves money.
We’ve found 20 lb bags of rice at our local grocery store on sale for less than $12. A couple of bags of those will meet your carbohydrate needs for weeks.
Buying in bulk doesn’t do any good unless you preserve the food, though.
Your best bet on a budget is inexpensive food storage buckets and mylar bags. You put the food in the mylar bags and then put the bags in the bucket. This two-stage system can keep your dry goods fresh for years.

The exact preservation technique depends on what you’re saving. I’ve written in-depth guide on how to store food long-term. Take a look at the tables in this article to learn how to store just about anything (and how long it lasts).
We also have a walkthrough on how to use mylar bags. I use the Pack Fresh Mylar bags, but anything inexpensive works!
See our full review on the Best Mylar Bags for Food Storage for more tips on saving money on mylar bags.
Look for Sales and Coupons
The key is to be patient here. When I see a huge bag of rice on sale, I buy it!
Sales and coupons aren’t predictable, but when they do pop up, they can save you a lot.
Signing up for email lists from major companies is an easy way to stay informed on deals (but you have to open the emails and sort through them).
We also have a Prepping Deals Page where we collect coupons and discount codes. Some of these are exclusive. Others we snagged from the company’s email lists.
What to Buy?
Now let’s get into specifics:
Dried and canned goods last the longest. But canned fruit likely doesn’t last as long as you think!
(It’s only a few months, in most cases. Plus, it is expensive)
Beans and rice are the lowest cost “foundations” of a prepper pantry. They last a long time in their original packaging, but you can repackage them in Mylar bags to make them last even longer. Plus, they have a good balance of macro nutrients to sustain us for weeks.
Buy Store or Generic Brands
Also consider off-brand items. These are usually on the bottom shelf or somewhere not as obvious because they want you to buy the expensive stuff! I found the Smart Way brand to be half the price of other name brand canned food.

What To Do if Cooking is Not Your Thing
If cooking is not your thing, another option is to buy freeze-dried meals. While these meals are initially more expensive than rice and beans from the grocery, consider the cost of all the ingredients, cooking, and storage. They also save time, energy, water, and cooking time later on. This is a hidden cost initially, but very valuable later on when these resources are critical.
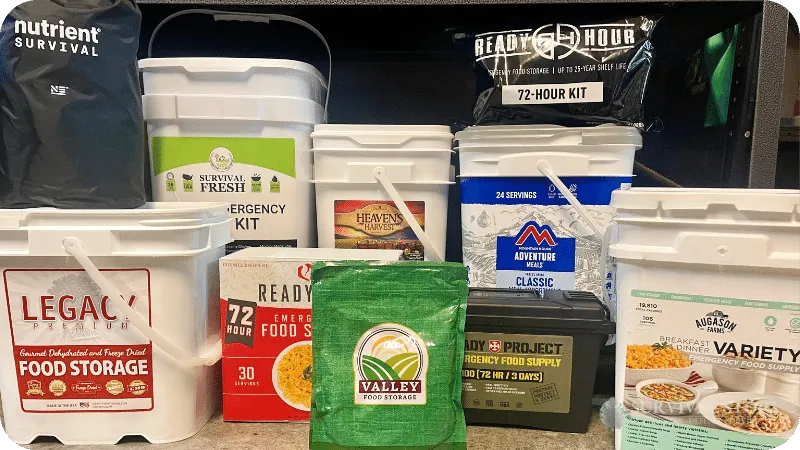
I have tested freeze dried meals extensively in my Best Emergency Food Kit guide and my Best Emergency Food Company guide.
My favorite options are Augason Farms and Heaven’s Harvest. They both make freeze-dried meals and Augason Farms makes single-ingredient #10 cans.
You only pay around 0.005 per calorie, less than you can purchase most non-perishables at your local grocery store.
We also have a discount code for both of them to save you 10% off. Find them in our individual review guides here:
Augason Farms Emergency Food Review and Heaven’s Harvest Emergency Food Review.
How to Cook Without Power
Many people forget that once the power is out, the stove and microwave doesn’t work. Our favorite emergency stove is less than $40, and fuel is relatively inexpensive as well. You can see more about it in our Best Emergency Stove for Power Outages guide.
3. Water
Store at least 14 gallons of water per person – enough for two weeks. You may need more if you rely heavily on cooking your own food.
I recommend the Aqua-Tainer 7 Gal Water Container for this purpose. It’s only $20 or so on Amazon, much cheaper than other options. It is also more durable and cheaper than buying bottled water at the store.

You should also have a way to filter and purify water. Since most people will be “bugging in,” skip the Life Straw filters and choose something a bit more substantial (and cheaper).
The best option currently available is the Uzima UZ-2 Water Filter. It’s around $85 but doesn’t require electricity and has a high capacity. Find out more about it in our Best Emergency Water Filter Guide.
Some people think they can skip this and just rely on boiling water. In my experience, heating mechanisms are more expensive to buy and run than a water filter (and it’s less effective). Plus, after a flood the water can be super silty and contaminated.
Water purification tablets are inexpensive and can treat a surprising amount of water. See our guide on the Best Water Purification Tablets for our favorites.
4. First Aid Supplies
First aid supplies are a surprising place to save money. Yes, you don’t want to go super cheap, but many first-aid kits are overpriced and contain worthless items. Many people miss that trauma supplies to stop severe bleeding are needed, not just band-aids and gauze.
After hands-on testing, we’ve discovered that Rhino Rescue is the best inexpensive kit. See our Rhino Rescue IFAK Review for more.

It includes a tourniquet, splint, gauze, burn dressing, emergency blanket, and tons of other emergency gear.
It does not include band-aids, pain relievers, and other basic medications. But, preferably, you should already have those in your home.
Your best bet is to keep using whatever you usually use. Just make sure you re-stock before you run completely out.
Once again, this is where sales and buying in bulk can help you save.
If you absolutely need a medication, keep at least two weeks’ worth on standby.
5. Personal Hygiene Items
As we all learned from COVID-19, personal hygiene items are important despite being overlooked.
Toilet paper and soap don’t seem so important until you run out!
Here’s a list of stuff to stock up on:
- Toilet paper
- Soap
- Toothpaste
- Feminine hygiene products
- Baby supplies
- Garbage bags
- Wet Wipes
Buy in bulk when you can. Toilet paper doesn’t go bad, so buying too much isn’t a huge deal.
You should still store them in a cool, dry place. A closet or basement works well.
Check for sales and coupons on personal hygiene items you already buy.
An easy way to stock up is to purchase an extra toothpaste (or whatever) whenever you pick one up.
If you only pick up one extra thing, make it wet wipes. In a widespread emergency you probably won’t have power and water could be scarce. Showers could be difficult or impossible to take.
6. Cleaning Supplies
Cleanliness is often one of the first things to go in a long term emergency. But that’s exactly how people get sick and minor injuries get infected.
Stock up on the cleaning supplies you typically use. Again, you can do this just by purchasing one extra of whatever you’re buying.
All-purpose cleaners and a disinfectant should be prioritized.
I also recommend learning how to make your own cleaners. Vinegar is one of my favorites since it is cheap and has many other uses as well.

7. Lighting
You don’t realize how much you need lighting until you don’t have it.
Candles are the cheapest option by far, but they have their drawbacks. They don’t work when wet, and you need an external way to light them. Plus, they are a fire hazard and only last so long. Flashlights are more reliable, but you’ll need spare batteries.
A better option?
Solar-powered lights. These charge during the day and provide light at night. My favorites are made by Hybridlight and are affordable. Plus, the batteries are included and never run out!
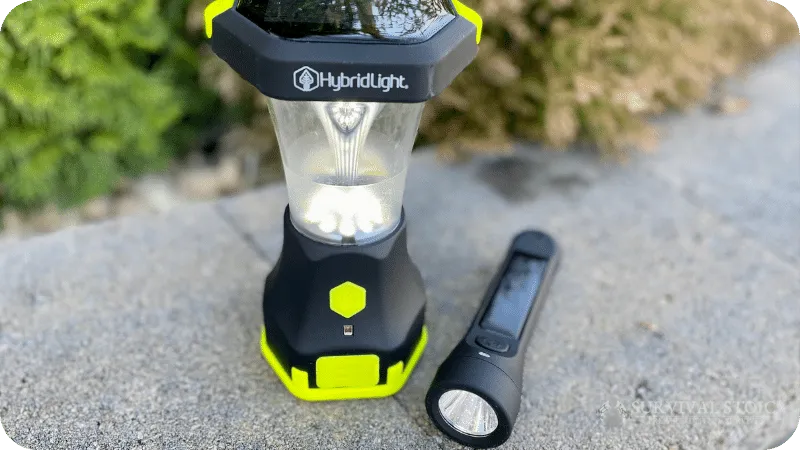
A hand-crank radio is another must. They have multiple uses including a power bank, flashlight, and radio. This helps to save money since you don’t have to buy multiple items. See our full review of the Best Emergency Radios for our favorites.
Stay practical. Don’t over-invest in fancy, expensive gear. The goal is reliable lighting and power options without breaking the bank. Consider the cost of batteries along with the device. A $5 flashlight is cheap, but the batteries will only last a few hours at best.
8. Tools and Gear
When it comes to prepping, tools and gear are more important than most people give them credit for.
The good news?
You don’t need a bunch of different tools and a backpack full of gear to be prepared.
One of the best investments you can make is a multi-tool. A good multi-tool combines several functions—knife, screwdriver, pliers, and more—into one compact item. These tools can handle everything from opening cans to making emergency repairs. Plus, multi-tools are very cost effective.
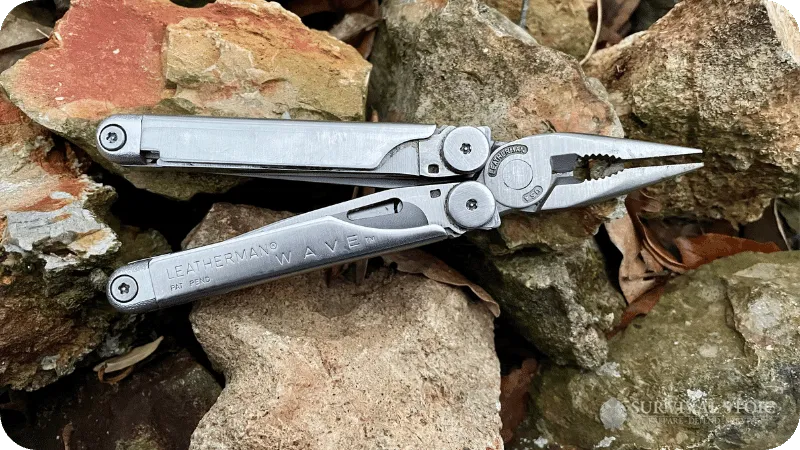
Best of all? You only have to spend money on one thing. You don’t need a full tool box.
Add in a roll of duct tape and some zip ties, and you can cover 90% of the repairs you will need to make.
9. Keep Going!
If you only walk away from this article with one thing, let it be this: keep going!
Prepping doesn’t have to be overwhelming or expensive if you take it one step at a time. Start small, be patient, stick to your budget, and slowly build up your supplies.
Remember:
It’s better to have a modest supply of essentials than wait until you can afford the perfect setup. Plan for the life you have now, not the one you might have in the future.
Even small efforts add up, and over time, you’ll be better prepared for whatever comes your way.
Stay focused, stay committed, and, most importantly, stay prepared.
Now, take a look at our How To Start Prepping guide and our Prepping Checklist for a comprehensive guide on how to prepare for emergencies and disasters. Also read our Budget Car Emergency Kit guide for tips on staying prepared when traveling. Our Generator Sizing Calculator will help you save money by not buying an oversize emergency generator!
